
These are the basics customers see on your website and in every email. The contact email matters most, so it is worth getting right on day one.
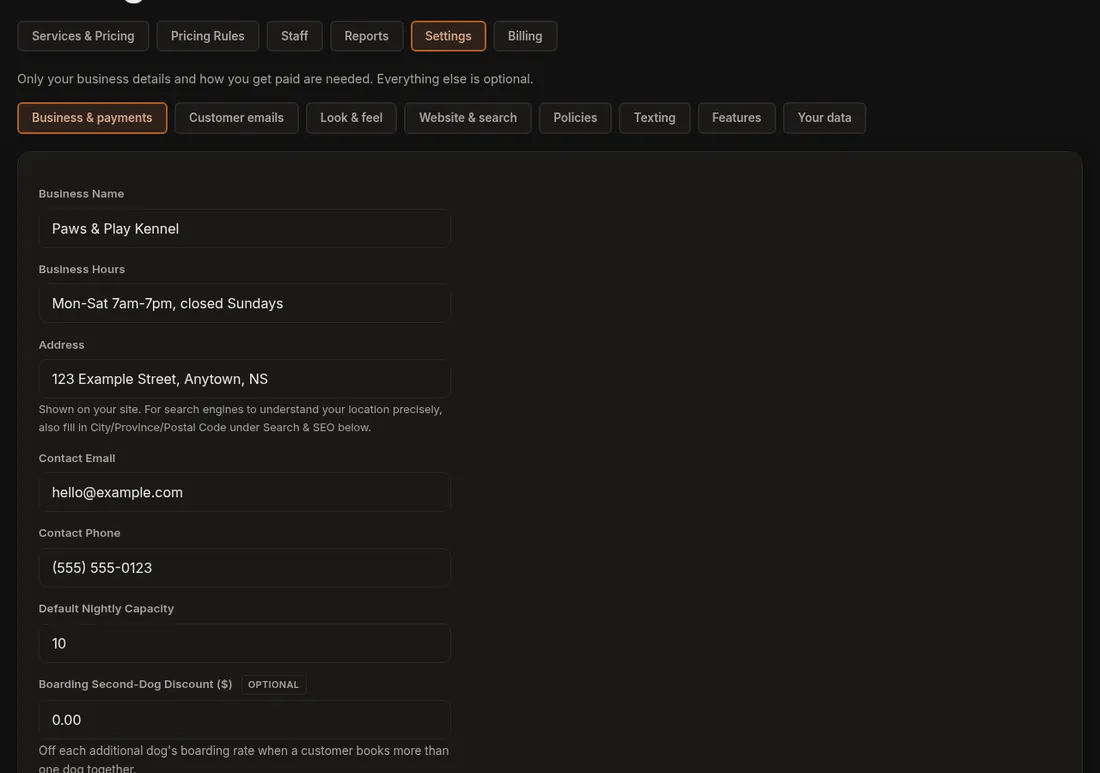
- Click Settings (the gear in the main menu). You land on the Business & payments section.
- Fill in Business Name, Business Hours (for example "Mon-Sat 7am-7pm"), Address, Contact Email and Contact Phone.
- Set Default Nightly Capacity, the number of dogs you can take on a normal night. You can change it for single dates later (see Capacity and availability).
- If you give a discount when one family books two dogs together, fill in Boarding Second-Dog Discount ($) and Daycare Second-Dog Discount ($). Say you enter 5 and a customer books two dogs for boarding: the second dog's nightly rate is $5 lower.
- Press Save Settings at the bottom of the form. A green "Saved." message appears at the top.
Good to know
- Your business name shows in the site header, in your emails and as the sender name on every email.
- When a customer replies to one of your emails, the reply goes to your Contact Email. Messages from the contact form on your site are sent there too, so use an inbox you actually check.
- Hours and address are shown on your site. For Google to understand your location properly, also fill in the structured address under the Website & search section (see Search engines).
- Your social media links are not here. They live in the Look & feel section of Settings.
- Only the account owner can see Settings.
If it does not work
- Business Name cannot be left empty, so the form will not save without it.
- If customer replies are not reaching you, check the Contact Email for typos and look in that inbox's spam folder.
Next you may want Services and pricing and Finding things in Settings.